
| |
$60.00
About this item
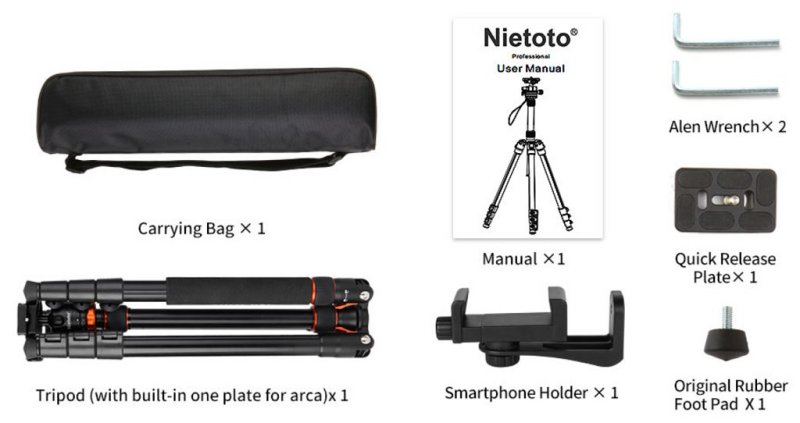
The multifunctional camera tripod is universally compatible with all cameras and equipment with 1/4"-20 and 3/8"-16 threaded holes , such as DSLR cameras, sports cameras, telescopes and projectors, etc. The carry bag have a multifunction phone holder can used for most cellphone.
The aluminum tripod can be easily turned into a monopod or walking stick alone to make your photography more diverse, It is a good companion for you hiking or traveling, And the center column can be inverted to used for low angle shooting and macro photography.
4-section column legs with quick release flip-locks allows you to adjust the working height flexibly from 16.5” to 68” in seconds. 3-position leg angle adjustment system helps you get support for level shots in any condition. 16.5" folded size with professional storage bag is very convenient for carrying and outdoor photography.
The camera tripod offers high level of stability using great quality level of magnesium aluminum alloy. It can withstand up to 33 lbs (15 kg). You can focus on taking photos or recording videos without worrying your hand may be shaky.
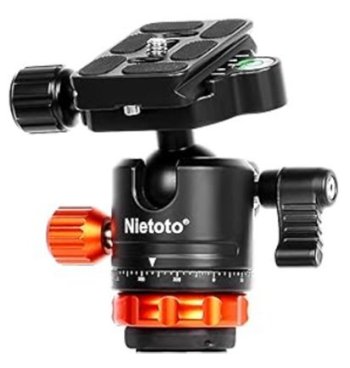
In the "Good Old Days" not so long ago when industry was your "friend" and worked to manufacture products both efficient and useful, virtually ALL camera tripods came with Tilt-Pan heads. Its not hard to see why, that is the most efficient and preferred way to use a tripod. Somewhere along the way a marketer (I presume) asked an engineer to design a solution for a non-existent problem, thus the detestable Ball-Head.
The ball head is difficult to operate, and it makes leveling the camera very difficult as the head swivels in any direction. Additionally, it supports much less weight than a tilt-pan setup. It is something no photographer would ever want to purchase, much less use. Do not take my word on this. You need only look at the detachable-head tripods for sale on Amazon. Virtually ALL the tripods come with the ball-head. Why? Because there is NO OTHER way to sell the accursed heads. It merely adds to the tripod cost because you must buy a Tilt-Pan head separately. Industry no longer even trys to be your friend. It all aggravates me.
By the way, before you toss the ball-head in the dustbin, remove the plate, it could be useful.
Jan 2025 addendum:
I have discovered a use for the otherwise worthless ball head mount. Remove it from the tripod where it serves no purpose and instead mount it on your tripod accessory bar (3/8” to 1/4” female adapter needed). Then you can attach the quick-remove plate to the back of your sound recorder. This allows you to adjust the recorder angle and easily dismount it from the accessory bar for downloading your recordings into the computer.
$60.00
About this item
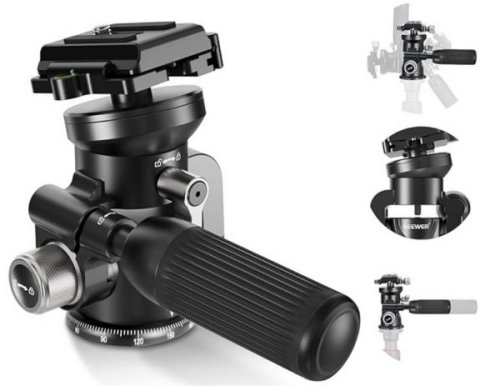
NEEWER TH03 all metal tripod head features a tilt and pan handle, and effortlessly rotates the camera 360° or tilt it +90°/-60°, ensuring seamless transitions from horizontal to vertical compositions, and stably supports cameras up to 11lb/5kg.
A bowl shaped leveling base enables you to pivot the camera 360° and slightly tilt it between -15° and +15° when precise adjustment is needed. After achieving an ideal angle, tighten the screw knob to keep the camera stationary.
Use the professional pan base to smoothly swivel the camera for panorama photography and videography. 360° scale markings help you revolve the camera with high accuracy and a dial knob can securely lock the camera in place
Arca type quick release system.
[Ed Note: With this tripod head one locks the tilt via a simple rotation of the tilt handle. This is very important as it allows one-handed operation for tilt adjustment. Many/most tripod heads these days feature a "bent" tilt handle that cannot be rotated. Tilt adjustment requires two hands, one to loosen a clamp and the other to change the tilt before then re-tightening the clamp. This is obnoxious and unnecessary and therefore to be avoided in your tripod head choice.]
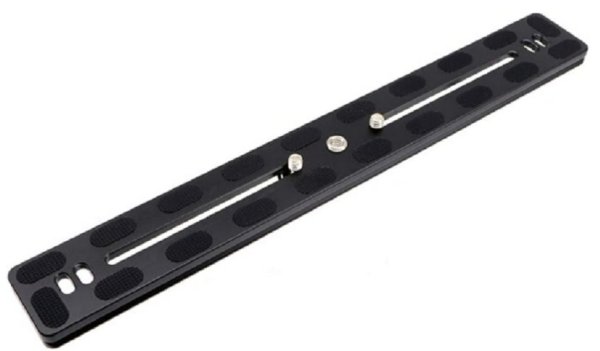
With D-Ring Screw for Tripod Ball Head DSLR Camera, Arca-Swiss Compatible
$26.99
$9.29
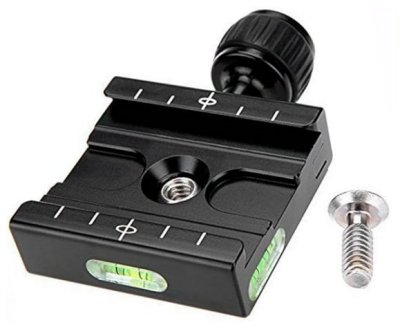
[Ed Note: Arca rail plates come mounted parallel to the tripod pan handle. As I need my accessory rail mounted sideways (normal) to the handle, this clamp allows a 90d rotation of the Arca mount.]
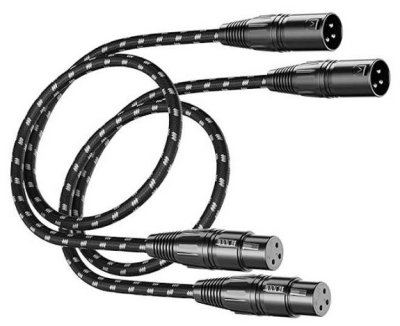
Mic Cord Braided Balanced 3 Pin Connector Male to Female XLR for Mixer, XLR Speaker Systems ect
$12.99
Mic Cover Wind Muff, Outdoor Microphone Wind Cover Compatible with Zoom H5 H6 and More, Grey
$11.99
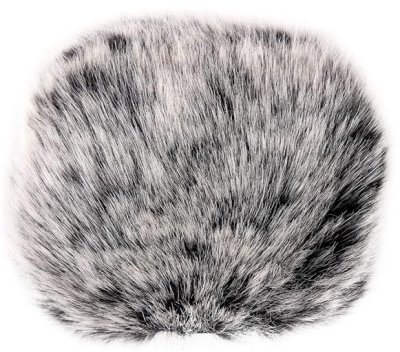
The wind muff not only prevents wind noise but importantly protects the microphone capsule from Houston humidity.
LCD Display Power Bank, 4USB Outputs, USB-C in & out Dual Input Phone Charging
$28 Amazon

USB Battery discharge versus time used with my actual setup:
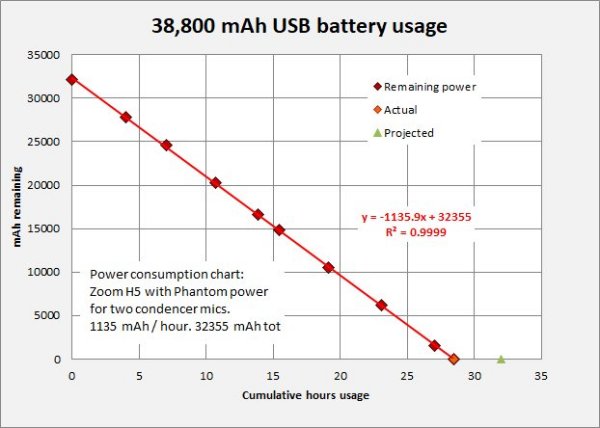
The above usage plot (powering an H5 recorder with two condencer microphones) for my battery indicates a 28.5 hour potential, suggesting 32355 mAh total power rather than the stated 38,800 mAh. Still quite respectable.
Rotatable Bracket with 1/4 inch Screw/Adjustable Clip
$7.99
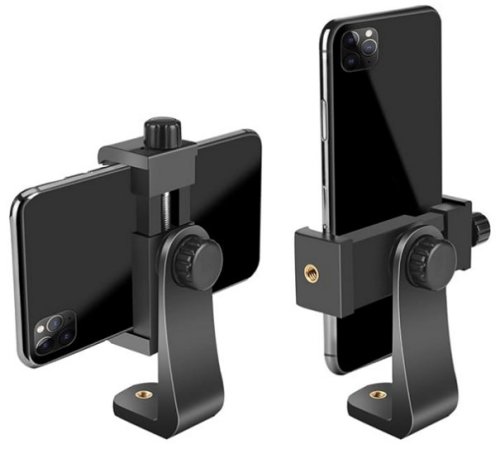
Note, I use this to mount the USB Battery to the tripod accessory bar.
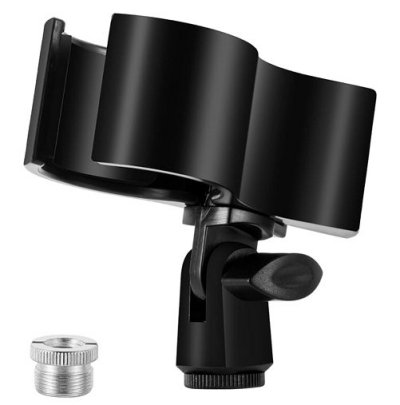
Adjustable Mic Holder for Microphones with Outer Diameter Range 1.26" from 2.3", with 5/8" Male to 3/8" Female Screw Adapter [3/8 male to 1/4 female adapter needed to mount to tripod accessory bar]
$7.99
[Ed note: Early on I had decided to avoid monitoring things with headphones. First it was an added expense but mostly it was because I did not, (and DO not) wish to be tethered to the tripod when I am out birding. I worry I will see a cool ringer that I need to get up move to a better viewing and photography location. Easy to imagine forgetting the headphones and pulling over the dish when reaching the end of the cord.
I finally sought a compromise by using a Bluetooth setup to allow monitoring without the cord. Latency is minor and not a problem, (not watching dialog on TV).]
1Mii B0305
$27

Transmit Mode:
1. Connect ML300 to a TV or another device with a 3.5mm audio cable.
2. Slide the mode button to the “TX’ side.
3. Please press and hold the 1Mii B0305 2 In 1 Wireless Transmitter and Receiver - icon 1button for about 2 seconds to enter pairing mode,(LED lights flashing red and blue).
4. Set your device (Bluetooth headphone or Bluetooth speaker) to pairing mode, and wait for the pairing to succeed. (LED stays blue).
$34

Turn On The Headphones:
Press and hold the power button for 3 seconds or until the LED indicator light flashes red and blue, it will prompt “Power On” and “Bluetooth mode”.
Pairing:
1. Start with X14 turned off.
2. Press and hold the power button until the LED indicator light flashes red and blue. It will prompt “Power on” and “Bluetooth mode.
3. Open your first device’ s Bluetooth settings and select “X14”. It will prompt “Connected”.